
Openbaarmaking van partners: SewingInsight.com is deelnemer aan het Ebay Partner Network en Amazon Services LLC Associates Program. We verdienen een kleine advertentievergoeding door te linken naar producten op Ebay en Amazon. Dit verhoogt de prijs voor u als lezer niet, maar u steunt onze kleine onderneming.

Ontwerpen van naaikamers
Een goed ingerichte naaikamer is van cruciaal belang voor taken die verband houden met naaien, maar ook voor mentale helderheid en het verhogen van de productiviteit. Uw naaigebied heeft een aanzienlijke invloed op wat u produceert. Stel je voor dat je overspoeld wordt door de willekeurige opstelling van naalden, stapels stof en draadklossen. U zult merken dat u tijd verspilt met het zoeken naar spullen die binnen handbereik moeten zijn, zoals een strijkplank of een schaar, en het zal onmogelijk worden om alles wat u nodig heeft in één keer te vinden. Hier komt het belang van een goed georganiseerde naaikamer om de hoek kijken. Alles is zoveel vloeiender als uw naaikamer goed is georganiseerd, met uw snijtafel aan de ene kant, goed georganiseerde planken aan de andere kant en uw dierbare naaimachine midden op uw naaitafel zitten. In deze handleiding bespreken we hoe u uw naaikamer kunt ontwerpen. We bespreken onderwerpen als het kiezen van de juiste locatie voor uw naaikamer, het creëren van een indeling voor uw naaikamer die de effectiviteit en ruimte vergroot, tips voor het ordenen en opbergen van naaibenodigdheden, het kiezen van de juiste kleur en verlichting voor uw naaikamer, het kiezen van de gereedschappen en meubels die nodig zijn om een nuttige naairuimte te creëren, en ideeën om uw naairuimte unieker en stijlvoller te maken.
Een locatie kiezen voor uw naaikamer
Laten we om te beginnen eens definiëren wat een naaikamer precies is. Een speciale ruimte voor naaien staat bekend als een naaikamer. Het is een plek waar u uw naaimachine en alle andere essentiële gereedschappen kunt opstellen. Kies een locatie in uw huis waar al uw naaiwerkzaamheden plaatsvinden. Het kan een logeerkamer zijn, de zolder, een hoek van uw woonkamer, uw kelder, een flinke bergkast of zelfs een ruimte boven de garage.
Een andere geweldige optie is uw logeerkamer. Nu is het zeker niet mogelijk om uw logeerkamer volledig in een naaikamer te veranderen, maar u kunt er toch gebruik van maken zolang er geen gasten aanwezig zijn. Soms heeft u thuis een kleine kantoorruimte. U kunt uw kantoorruimte zelfs als naaikamer gebruiken als het kantoor het grootste deel van de tijd ongebruikt blijft. Houd er rekening mee dat het naaioppervlak niet enorm hoeft te zijn, maar wel ruimte moet bieden aan de ideale naaitafel en opbergruimte. U moet ook bevestigen dat de locatie die u kiest gemakkelijk toegang heeft tot stopcontacten voor uw naaimachine, strijkplank en ander gereedschap dat nodig is voor het naaien.
Voor- en nadelen van verschillende naailocaties
1. Een hele kamer gewijd aan naaien, zoals je slaapkamer of een logeerkamer
Pluspunten:
- Biedt een locatie voor het bewaren van een groeiende collectie naaibenodigdheden.
- Stopcontacten kunnen in grote aantallen worden geïnstalleerd.
- Het is een serene omgeving waar je ongestoord kunt naaien.
Nadelen:
- Kan de kamer niet voor andere doeleinden gebruiken, aangezien deze uitsluitend voor naaien is bedoeld.
2. Gedeelde ruimtes zoals een kelder, een eetkamer of een garage
Pluspunten:
- Als u geen extra ruimte in uw huis heeft, zijn gedeelde ruimtes ideaal om een hoek aan te passen om te naaien. Het enige dat nodig is, is een beetje planning.
Nadelen:
- Biedt een locatie voor het bewaren van een beperkte collectie naaibenodigdheden.
- Moet regelmatig worden schoongemaakt. De kelder moet bijvoorbeeld regelmatig worden schoongemaakt, omdat kelders doorgaans vies en vochtig zijn. Het kan dus lastig zijn om ze vlekkeloos te houden. Een ander voorbeeld is dat de eetkamer moet worden opgeruimd voordat het diner wordt geserveerd.
- Op warme, vochtige dagen kan het erg lastig zijn om in een kelder of garage te zitten naaien.
3. Kamers voor dubbel gebruik, zoals een logeerkamer of een thuiskantoor
Pluspunten:
- De ruimte kan voor dubbele doeleinden worden gebruikt, wat een verhoging van de efficiëntie van de ruimte betekent.
- Stopcontacten kunnen in grote aantallen worden geïnstalleerd.
- Het is een serene omgeving waar je ongestoord kunt naaien, mits er geen gasten of kantoorbezoekers zijn.
Nadelen:
- Kan de kamer niet gebruiken om te naaien als er gasten in huis zijn of terwijl de kantoorruimte in gebruik is.
Opslag en indeling
1. Plan de indeling van uw naaikamer
Overweeg om te gaan zitten en de indeling van uw naaikamer te plannen voordat u uw naairuimte inricht. U wilt niet beginnen met het verschuiven van tafels en stoelen om er vervolgens achter te komen dat de plek die u voor uw naaitafel heeft gereserveerd, er niet op past. Daarom is het maken van een inrichtingsplan een efficiënte aanpak om dit te bereiken. Ruitjespapier of een betrouwbaar grafisch programma kunnen u helpen bij het plannen van de lay-out. U moet eerst een meting uitvoeren en de cijfers van het gewenste naaigebied noteren. Als u ruitjespapier gaat gebruiken, bepaal dan hoeveel vierkanten per voet u nodig heeft en gebruik vervolgens een liniaal om de omtrek van de kamer te schetsen.
Als u in plaats daarvan een grafisch programma gebruikt, maakt u een nieuw bestand en past u dit aan de grootte van uw kamer aan. Activeer vervolgens de rasterfunctie. De afbeelding wordt door het raster in vierkanten van 1/4 inch verdeeld, waarbij dikkere lijnen vierkanten van 1 inch weergeven. Dit is erg handig als u uw spullen verplaatst.
Teken dikke lijnen naast de deuren om hun locatie aan te geven, gevolgd door een schuine stippellijn om aan te geven hoeveel ruimte er nodig is om elke deur te openen. Als je rondom je ramen moet ontwerpen, teken dan een grotere lijn op de plek waar ze zich bevinden. Zo voorkom je dat je planken of kasten voor de ramen plaatst. Meet de breedte en lengte van elk van uw belangrijkste meubelstukken. Hiertoe behoren uw naaitafel, naaistoel, strijkplank, snijtafel en eventuele planken of kasten die u wilt gebruiken.
Teken deze op een ander stuk ruitjespapier als u ruitjespapier gebruikt, en zorg ervoor dat u het schaalt in lijn met de tekening van de kamer. Label elk stuk als je klaar bent en knip het uit. Deze uitsparingen kunnen in uw kamer worden geplaatst, verplaatst en vervolgens opnieuw worden gepositioneerd totdat u een indeling ontdekt die u leuk vindt. Als u een grafisch programma gebruikt, maakt u een nieuw bestand aan dat proportioneel is aan het meubelstuk dat u wilt weergeven. Gebruik het gereedschap voor aangepaste vormen om een zwarte rand rond de afbeelding te maken. Gebruik het tekstgereedschap om de afbeelding een naam te geven nadat je de achtergrond hebt ingevuld met de kleur die het meest op dat specifieke meubelstuk lijkt. Start een nieuwe vijl en herhaal deze procedure voor elk meubelstuk dat u in uw naaigebied wilt plaatsen. Sla alle bestanden op met een nieuwe naam zodra u klaar bent.
U kunt uw meubels nu naar eigen inzicht herschikken, en zelfs bepaalde stukken roteren. Sla het bestand op zodra u klaar bent met het aanpassen van de lay-out. U kunt het ook afdrukken, zodat u het visueel kunt raadplegen terwijl u uw meubels verplaatst.
2. Tips voor het opbergen en ordenen van naaibenodigdheden en -benodigdheden
Hieronder volgen enkele ideeën voor het opbergen en ordenen van naaibenodigdheden en -apparatuur:
- Maak gebruik van doorzichtige potten

Linten, elastieken, draden en stofresten mogen nooit in dezelfde container worden bewaard. Sorteer uw accessoires in transparante potten, zodat u zich geen zorgen meer hoeft te maken. Ze maken het organiseren van naaiaccessoires eenvoudig en u heeft een duidelijk zicht op uw naaibenodigdheden.
- Hang een ophangbord op
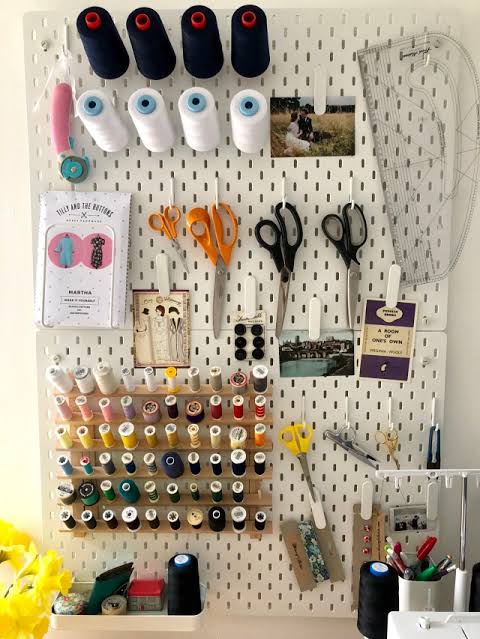
Naaisters zijn zich ervan bewust dat bij het naaien zoveel kleine accessoires en instrumenten betrokken zijn, dat de organisatie ervan bijna nooit ideaal kan zijn. Het ideale antwoord is een pegboard. Met behulp van dit display wordt elke draad, elastisch, cutter en andere accessoires zijn altijd beschikbaar.
- Investeer in een stevig bureau
Een groot, ruim bureau is precies wat u nodig heeft om al uw knutselinstrumenten en benodigdheden op te bergen en de uitstraling van uw naairuimte te verbeteren. Bovendien zorgen de open lades in het bureau voor eenvoudige toegang.
- Maak gebruik van bindklemmen om linten en elastieken bij elkaar te houden

Uw naaigebied kan vol raken met elastieken, linten en andere soortgelijke accessoires. Gebruik dus bindklemmen om ze bij elkaar te houden. U vindt snel wat u zoekt en het organiseren wordt daardoor eenvoudiger.
- Stoffen kunnen worden opgeslagen en georganiseerd met behulp van stripboekenborden

Stripboekborden helpen kreuken te voorkomen en strips in onberispelijke vorm te houden. Als gevolg hiervan kunt u uw textiel opbergen en ordenen door ze over stripboekenplanken te wikkelen. Op deze manier zijn ze eenvoudig te identificeren en te lokaliseren wanneer u ze nodig heeft.
- Gebruik archiefkasten om stoffen op te slaan

Denk ook eens aan het opbergen van stoffen in archiefladen. Ze kunnen veel ruimte besparen en maken het snel en eenvoudig om de stof van uw keuze te kiezen.
- Stapel de draden en spoeltjes op elkaar

Als u de juiste draden op de bijpassende spoeltjes stapelt, hoeft u zich geen zorgen te maken dat u ze kwijtraakt. U hoeft alleen maar korte deuvelstangen te gebruiken. Door dit te doen, hoeft u, zodra u begint met naaien, geen tijd te verspillen aan het zoeken naar de juiste spoel.
- Bevestig uw meetlint met lijm aan uw naaitafel
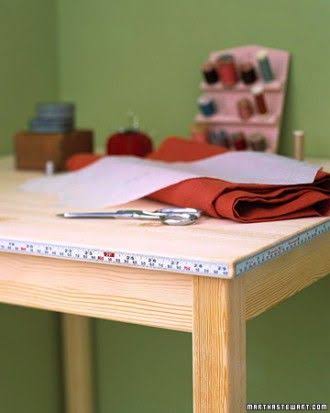
Als je je meetlint op de meettafel lijmt, raak je hem niet meer kwijt. Omdat de tape wordt vastgezet, wordt het meten bovendien eenvoudiger.
3. Aanbevelingen voor rekken, kasten en andere opslagoplossingen
Planken
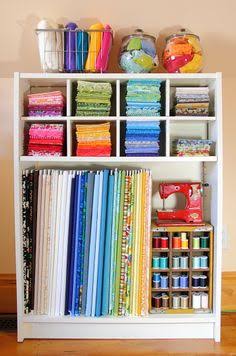
Omdat je er een grote verscheidenheid aan voorwerpen op verschillende manieren in kunt opbergen, zijn planken uitstekende opbergruimte voor naaikamers. Planken zijn verkrijgbaar in verschillende niveaus, zodat u uw naaibenodigdheden op elke gewenste manier kunt rangschikken, of u nu besluit om opbergdozen, potten, tassen of alleen maar hopen gevouwen stof te gebruiken.
Er zijn verschillende stellingkasten waar je rekening mee moet houden. Ze zijn verkrijgbaar in verschillende maten, passend bij uw kamer, en er zijn dozen die in elke plank passen. Zelfs het plaatsen van enkele zwevende planken om uw naaibenodigdheden georganiseerd te houden is een optie als u weinig vloeroppervlak heeft.
Kasten

U kunt al uw textielstiften, draden, naalden en ander gereedschap in opbergkasten opbergen, zodat ze allemaal direct bij de hand zijn. Met kasten hoef je je geen zorgen te maken dat je uit het oog verliest waar je spullen neerzet. U kunt kasten in elke gewenste vorm of maat aanschaffen, omdat ze allemaal zijn ontworpen voor het opbergen van uw naaibenodigdheden, afhankelijk van wat het beste bij uw behoeften past. Als je van plan bent hem als accessoirehouder te gebruiken, wil je er misschien een kopen met veel planken en opbergruimtes. Voor het bewaren van uw naaistrijkijzer, rolmessen en ander gereedschap kunt u kasten met speciale compartimenten vinden. Hierdoor wordt alles op één plek geplaatst en kunt u eenvoudig vinden wat u nodig heeft wanneer u het nodig heeft.
Enkele beste aanbevelingen voor planken en kasten voor het opbergen van uw naaibenodigdheden:
Sauder Craft Pro-serie open opbergkast

- Het bovenoppervlak van melamine is hitte-, vlek- en krasbestendig.
- Zes verstelbare planken voor flexibele opbergmogelijkheden.
- Witte afwerking.
- Gebouwde houtconstructie.
Sauder Diverse opberg- en naaikast
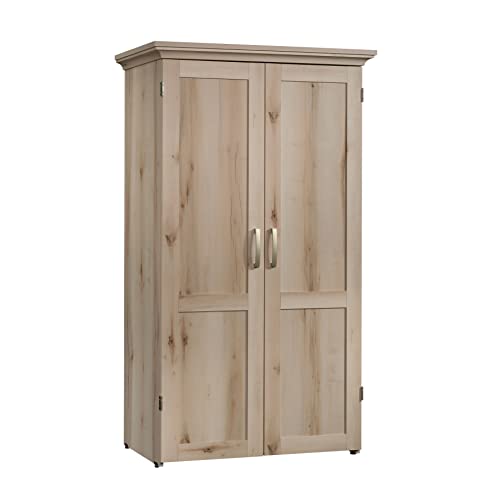
- Ruimtebesparende kast fungeert als knutsel- en naaipantser.
- Plank met volledig uitschuifbare geleiders en uitklapbare bladverlenging voor extra werkoppervlak.
- De middelste plank is ook voorzien van een stekkerdoos met zes stopcontacten voor gemakkelijke toegang tot elektriciteit.
- Zes verstelbare planken voor een verscheidenheid aan spullen.
- De onderste uitschuifbare plank is voorzien van metalen geleiders en veiligheidsstoppen.
- Pacific esdoorn afwerking.
- Gebouwde houtconstructie.
Hyggehaus apothekerskast met lades
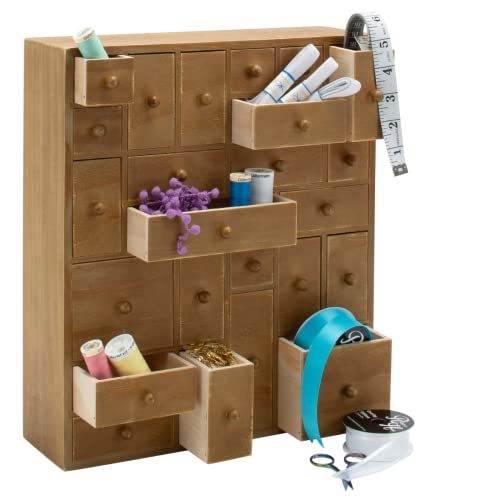
- Deze stevige grenenhouten apothekerskast met lades is ontworpen om netjes op je aanrecht te passen, waardoor je meer ruimte hebt om te werken.
- De opbergorganizer met 24 lades heeft 6 lades van verschillende afmetingen, van mini (1x3 inch) tot groot (3x3 inch).
- Elke lade heeft zijn eigen individuele compartimenten, zodat er geen spullen door elkaar raken als de kast wordt verplaatst of gekanteld.
Arrow K7811 Draagbare opbergkast met 3 lades voor naaiwerk en handwerk

- Afmetingen Joey II kast: 25 3/4" B x 16 1/2" D x 24" H.
- Afmetingen bovenste twee lades: 22 1/2" B x 13" D x 2 1/2" H.
- Afmetingen onderste lade: 22 1/2" B x 13" D x 8" H.
- Gemaakt van melaminelaminaat, MDF en composiet.
Amazon Basics 5-plank verstelbare, Heavy-Duty opbergrek
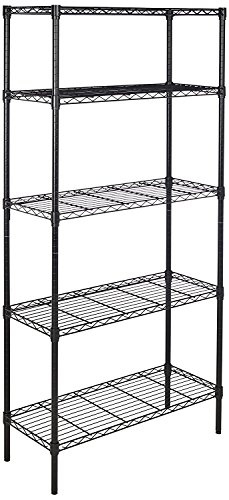
- Volledig verstelbaar, je kunt elke plank in stappen van 2,5 cm omhoog of omlaag verplaatsen door de zwarte, plastic hoezen rond de metalen palen te knippen.
- Beschikt over een sterke staaldraadconstructie, stelvoetdoppen en eenvoudige montage zonder gereedschap, waarbij alle benodigde componenten zijn inbegrepen.
- Ideaal voor het opbergen van uw naaibenodigdheden.
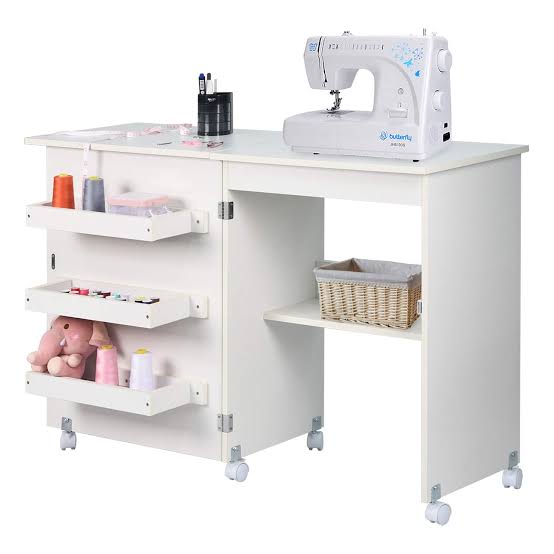
Naaitafel
Hoe kunnen we deze lijst afsluiten, zonder een naaitafel te noemen? Op een naaitafel kunt u zowel uw projecten naaien als uw naaibenodigdheden bewaren. Naaimachinehouders bevinden zich op het hoofdbureau van een naaitafel waar uw naaimachine op staat. Er zijn extra kratten of bakken met verplaatsbare planken en veel opbergruimte. Er zijn zowel open als gesloten laden voor meer handige opslag.
De meeste naaitafels hebben naast een bijzettafel als werkplek ook een achtertafel voor extra werkruimte. Kleine naaiplekken profiteren enorm van de mogelijkheid dat sommige naaitafels kunnen worden ingeklapt als ze niet worden gebruikt.
Onze aanbeveling voor een geweldige naaitafel:
Arrow Judy Naaikast met Lift Wit

- Naai in elke positie, platbed of met vrije arm, met het ergonomisch in hoogte verstelbare hydraulische luchtliftmechanisme.
- Ideaal voor naaimachines: 20 7/8"W (van links naar rechts), 11 3/8"D (voor naar achter), Hoogte: 13", tot 55 pond.
- Dankzij de vergrendelbare zwenkwielen kunt u stabiel naaien en gemakkelijk in uw kamer bewegen.
Nog enkele opbergideeën
- Tijdschriftenhouder: Je naaiboeken en patronen naaien kan worden georganiseerd met behulp van een tijdschriftenhouder. Smeltbare interfacing kan hier in containers worden bewaard en in karton gewikkelde stofresten zijn ook een fantastisch gebruik voor deze ruimte.
- Mason-pot: Mason jar-organizers zijn handig voor het bewaren van naaibenodigdheden zoals linten, knopen en andere items. Deze bakken kunnen worden gestapeld en aan de muur worden gemonteerd.
- Plastic bakken gerangschikt op kleur: Koop doorzichtige plastic bakken in verschillende maten. Sorteer uw stof op kleur en leg elk restje voorzichtig in de container. Met deze methode wordt het vinden van de exacte stof die u nodig heeft in de exacte maat en kleur eenvoudig. Vilt, bont en ander moeilijk stapelbaar textiel zijn ideaal voor dit soort arrangementen.
- Maak gebruik van een Toolbox: Gereedschapskisten kunnen fantastische organisatorische hacks zijn als u slechts een paar naaibenodigdheden hoeft te organiseren. Er zijn draagbare tot grote gereedschapskisten beschikbaar. Hierdoor heeft u alle ruimte om uw naaibenodigdheden gemakkelijk te ordenen.
- Bewaar kleine voorwerpen in toegankelijke containers die gemakkelijk te vinden zijn.
- Label alles, zodat u eenvoudig kunt vinden wat u nodig heeft.
- Als u niet over een gespecialiseerd naaiatelier beschikt, maak dan gebruik van de muurruimte.
- Plaats de benodigdheden die u vaak gebruikt in lades waar u gemakkelijk bij kunt.
- Leg handleidingen en andere spullen die je niet vaak gebruikt in lage lades.
- Om alles zijn eigen ruimte te geven, gebruik je ladeverdelers.
Kleur en verlichting
1. Het belang van goede verlichting bij het naaien en knutselen
Ongeacht de taak die wordt uitgevoerd, elke werkplek heeft voldoende verlichting nodig. In een naaiatelier is het gebruik van de juiste verlichting een cruciaal aspect dat vaak wordt genegeerd. Hoewel overmatige verlichting kan leiden tot gezondheidsproblemen zoals hoofdpijn en spanning als gevolg van verblinding, veroorzaakt slechte verlichting vermoeide ogen, vermoeidheid en naaigerelateerde gevaren. Bovendien zorgt slechte verlichting ervoor dat u gaat loensen, wat hoofdpijn en uitputting kan veroorzaken tijdens het naaien. Belangrijker nog is dat slechte verlichting ervoor zorgt dat mensen naar voren leunen om dingen duidelijk te zien. Frequent en langdurig slungelig resulteren in spierspasmen en rugpijn. Deze omstandigheden zullen resulteren in meer fouten, wat zal resulteren in minder voltooide werken met slechte kwaliteit en lage output.
Goede verlichting is van cruciaal belang om vermoeide ogen te verminderen en ervoor te zorgen dat u langer met plezier kunt knutselen, of u nu werkt aan kleine handwerkjes van vijf minuten of aan grote quiltprojecten die een maand duren.
2. Choosing the best type of lighting for your sewing room
For any focused job, such as sewing or handicrafts, natural light is always the best. However, there will always be days when it will be stormy and cloudy, making it impossible to use natural light. Additionally, some sewers prefer to work at night. In these situations, you must simulate natural light in your workspace. Unfortunately, turning on the lights in your living room alone won’t be sufficient. Instead, you’ll require a strong light to illuminate the area you’re working in and reduce eye fatigue. The optimal lighting for almost all sewing rooms is high-temperature illumination with a CRI grade of at least 90–95 or higher and a Kelvin temperature of 5000K to 6500K.
Color Bulbs
You must take the color of the light into consideration as you search for the ideal lighting for your sewing area. It’s always a good idea to select light bulbs that emit bright white light. The best lighting is bright white light, since it has an overall brightness that makes a sewing room more visible and prevents eye strain while you are working. Avoid using yellow or orange light bulbs since they lack the brightness needed to properly illuminate your room.
Overhead Lightings
Overhead lights actually do a good job of illuminating the general area for you. You can install overhead lighting in the form of flush-mount lights, semi-flush-mount lights, or even pendants.
- Flush Mount Lights
One of the best lighting options for your sewing room is flush-mount lighting, which will ensure that your room and the area surrounding your sewing machine are well-lit.
These lights are typically affixed directly to the ceiling. The surface of the ceiling and the lights are flush with one another. The best overhead lighting for your needs is this if your space has a low ceiling.
- Semi-Flush Mount Lights
There is one key distinction between flush-mount lights and semi-flush-mount lights, despite the fact that they are basically comparable. With a rod or chain securing them to the ceiling surface, they are typically suspended from the ceiling.
You can choose semi-flush-mount lights if your room’s ceiling is high because there is room for them to hang downward.
- Pendants
A chain or a rod is used to suspend pendant lights from the ceiling. They have ceiling-mounted lamps dangling at the height you choose. When used as spot illumination, these lights work well.
You can have two or more pendant lights, depending on the size of your space or where you want to put your sewing machine.
LED Table Lamps
Investing in an LED table lamp will help you brighten your sewing area. You can easily choose a lamp that is ideal for your sewing table because they come in a variety of shapes and sizes.
Many contemporary LED lamps also include brightness controls and are mobile, allowing you to utilize one on any desk in your sewing room.
- Magnifying Desk Lights
When stitching, you may frequently wish to examine your stitches more closely or make sure you can clearly see the needle’s eye. To perform these tasks, you must be in a well-lit area where you can see properly. The best option for people who want to see minute details while sewing is a magnifying desk lamp.
- Adjustable Desk Lamp
You can set an adjustable desk lamp to the height and distance that are most comfortable for you. These are straightforward and quick to put on your desk, so they are available for use whenever you need them.
- Battery Operated Lights
A battery-operated light is your best bet if you’re considering employing something portable. As long as the battery is fully charged, this light has the advantage of being practical and incredibly reliable.
LED Floor Lamps
No matter where you perform your sewing or stitching, LED floor lamps provide you with the flexibility to position them properly thanks to their adjustable gooseneck. The gooseneck may be rotated and bent at whatever angle you choose.
2000 lumens is the typical brightness of a floor lamp. It produces a lot of impressive light. It also uses the least amount of electricity possible. That is what we mean when we say something is both effective and efficient. Additionally, you have the option of dimming the light’s brightness.
3. Choosing the right colors for your sewing space
It has long been believed that color can affect how we feel. Due to the fact that sewing is a creative process and colors act as triggers, this is particularly crucial for creativity. Certain colors can elicit a variety of feelings and sensations.
Some hues are even used to prototype particular emotions. Colors affect our emotions and psychological well-being. Therefore, choosing the best color for our sewing room is a must.
We would first like to introduce you to some colors that best elicit creative thinking:
- Red is a color linked to adoration, provocation, and passion.
- Blue is frequently used to inspire, heal, and unwind.
- Black and white have a calming effect and can be soothing.
- Orange is an upbeat and warm color.
- A color that represents creativity, growth, vitality, and nature is green.
- The color purple is linked to aristocracy, strength, and vitality.
- Yellow is frequently used as a symbol of joy.
There are numerous other colors that, in addition to those already listed above, might influence your mood and creativity. So, how do you choose the best colors for your sewing space?
The finest colors for a sewing area are breezy, light hues. However, since every person has a unique sense of fashion and taste, selecting the ideal hue for a sewing room is a matter of personal preference.
The ideal colors to use when sewing are green and blue, since they promote a pleasant and relaxing atmosphere. They are also excellent options for small spaces since they give the impression that the walls are receding.
If you want your sewing room to look warm and bright, you can choose warm tones. They are energizing enough to produce a thrilling atmosphere for high levels of productivity. You can choose from colors like red, pink, and orange. Large sewing rooms will work just fine with these colors.
It is ideal to use cool colors if your sewing area doubles as a bedroom. There is no need for overpowering color in the bedroom atmosphere. The ones that promote serenity and relaxation are the greatest. You can choose from a variety of options, such as grey, green, and blue.
One additional note is that most people also tend to avoid bright colors in their sewing rooms. They consequently choose to use more neutral hues like black, white, grey, and brown. These colors evoke feelings of coziness, relaxation, and peace.
Meubels en gereedschap
1. Essential furniture and equipment for a functional sewing room
You’ll need a sewing machine, a sewing table, and a cutting table as part of your sewing room’s main furniture and equipment. Along with this, you’ll also require a comfortable sewing chair, an iron with an ironing board, and lots of storage for storing your sewing supplies. Ideally, a sewing room will allow you to work without having to put anything away after each session. Ideal would be a table where you could leave your sewing machine out. Also, it would be great if you could leave your iron and ironing board outside. Sewing requires an indefinite amount of equipment. With each project come unique accessories. So, to keep it simple, we have highlighted the essential furniture and equipment required for your sewing room below:
- A Fantastic Sewing Machine
Your sewing efforts can succeed with a quality sewing machine or fail with the wrong machine. Use a naaimachine that will be useful for the projects you intend to work on. For instance, to sew heavy-duty items, it makes little sense to get an inexpensive, light-weight sewing machine.
The more durable the machine, the better if you’re eager to start working with projects that call for materials like denim, canvas, or anything else with a decent weight.
Are you a beginner or an expert? When choosing the best sewing machine, this is the most crucial thing to take into account. You can learn a lot from just this one question, including your budget, the size of the sewing machine, the available features, and much more.
Before beginning your search, you should also think about your budget. The expensive sewing machines might not be within your means if you have a tight budget.
- A Sewing Table
If you believe a sewing table is not necessary, reconsider. It’s never a good idea to sew on a rough, shaky surface. Ideal sewists will always have a sewing table as an integral part of their sewing furniture. The size of the sewing table is one of the main aspects you must take into account when making your selection. In order to fit your sewing machine and all of your sewing supplies, you should make sure the table is large enough. Choosing a table with lots of storage space is a good idea if you have a lot of goods. The height of the sewing table should also be taken into account when making your decision. In order for you to work well, you should make sure the table is at a height that is comfortable for you. Another option is a table that can be adjusted in height.
When picking a sewing table, you might also want to take your type of sewing machine into account. A table that can bear the weight of your sewing machine is necessary if it is a heavy-duty machine. Another significant factor to think about is the sewing table’s material. Consider a sturdy material like wood if you intend to use your sewing table frequently. A less expensive material, like plastic, can be a preferable choice if the table will only be used infrequently.
Long periods of sitting are necessary for sewing crafts, which may result in fatigued muscles and back pain. Your productivity becomes unprofessional as a result of these physical issues. Therefore, you must get a comfy and practical sewing chair if you want to avoid such issues.
The ideal sewing chair should have comfortable foam, supportive armrests, and a suitable backrest. When buying a sewing chair, you should not ignore the seat cushion’s padding. Avoid using a seat cushion that is too fluffy. Vinyl that has been quilted can provide the nicest seat cushion.
To prevent your back from bending while working, the chair’s backrest needs to be strong and straight. It should be positioned so as to maintain the natural curvature of your vertebral column and not interfere with the support provided by your lumber.
To make working with clothing easy, the ideal swing chair for your sewing job must be able to swivel at any angle. The chair’s height is another crucial component of sewing chairs. The chair needs to be at the right height for the worker to easily reach the work surface.
If you’re confused about which best sewing chair to select, check out our post on the best sewing chairs:
Get a separate cutting table to prevent your sewing table from becoming crowded and overburdened. You must first choose the size of the cutting table you require. A more compact table might be best for a novice. You need a larger table surface if you’re a professional, especially if you want to utilize it for more than just cutting. You require a tabletop that is steady and resilient to heavy use. Aluminum and steel are the most durable building materials for cutting tables. Aluminum is preferable to steel for portability since it is lighter. Also take into account the table’s overall weight. The lighter the table, the easier it will be to transport. Wheels are usually required for heavier tables since they are more stable. To avoid swaying, if at all possible, select wheels that can be secured. Search for cutting tables with shelves and drawers because these are useful for keeping supplies. Additionally, you have the option of selecting a foldable table. Another option is an adjustable cutting table with a height ranging from 25 to 45 inches.
- Storage Space
The requirement for storage space is crucial for sewers. It is advisable to spend money on storage containers, racks for organization, shelves, clear bins, and storage cabinets unless you want to wind up with an irritating accessory stockpile.
We have discussed in detail storage ideas at the beginning of this post under the heading Storage and Layout. You may go through that again if you have any doubts. Open shelf storage is a good option if you have limited floor space for storing items like sewing books and magazines. Sewers often have boeken naaien En tijdschriften flooding their sewing rooms.
The iron is a crucial piece of equipment for properly completing the sewing project. It complements a sewing machine because of this. Without a good iron that is made for sewing, pressing seams is difficult. In order to prepare the cloth for cutting and for adding fusible interfaces to finish the sewing project, ironing is necessary at every stage. It is impossible to skip or avoid pressing when sewing since it gives the fabric a polished appearance and gives the finished garment you have made a professional appearance. Nowadays, cordless irons have become very popular as they are hassle-free to carry around and press. For the best cordless iron, you can check out:
- Ironing Board
Due to their small size and exceptional endurance, ironing boards have become increasingly popular among sewers. There are four basic categories of ironing boards from which you can choose the ideal one for you:
Floor-Standing Ironing Board: Floor-standing ironing boards are one of the most popular forms of ironing boards. Many sewers prefer this type of board because of its portability. You can easily move these convenient ironing boards from one location to another.
Tabletop Ironing Board: In order to iron clothes more firmly, tabletop ironing boards are made to be placed on top of a table. The tabletop ironing board’s one limitation is that you cannot use it to iron particular pieces of clothing. One cannot fit huge clothes on the board due to their modest size.
Wall-Mounted Ironing Board: Modern homes, particularly apartments in cities, have constrained space. Ironing boards that are wall-mounted may be the best option in such homes. The wall has these boards fastened to it. The fact that these ironing boards take up no more room on the floor is their best quality.
Over the Door Ironing Board: An extension of wall-mounted ironing boards is over the door ironing boards. In order to attach them to the door, they have a frame. These boards can be folded up when not in use and are wall-mountable.
- Tornmesje
There may be times when you sew with the wrong sides of the cloth facing each other, or you might sew the left sleeve to the right sleeve opening. Scissors could harm the cloth if you attempt to rip a seam. In such circumstances, a seam ripper comes in handy. The seam ripper’s design allows it to precisely cut the thread while slipping between layers of fabric.
Fabric must be cut with scissors before sewing can begin. Also, scissors are required for numerous other sewing tasks. Get a good set of scissors to use only for your sewing endeavors.
- Schroevendraaier
For seamstresses, a screwdriver is a helpful tool. You can use it to swap out your needles or to reveal any components of your sewing machine that require maintenance.
A sewing machine’s moving parts need to be oiled frequently. So, keeping oil with you at all times is mandatory. But do not use ordinary oil. Use oils that are meant specifically for use on sewing machines.
- Roterende snijder
A circular blade and handle are what make up a rotary cutter. A rotary cutter will produce better results when cutting your pattern pieces if you want to work with silk. Simply lay the pattern piece on the silk and use a rotary cutter to cut the edges. To cut the pieces of clothing, use a smaller blade. For cutting straight edges and quilting, a bigger blade is ideal.
The variety of sewing needles available in craft stores could surprise you. Always maintain a sizable stock of both hand and machine sewing needles.
2. Recommendations for ergonomic furniture and accessories to prevent fatigue and injury
Many repeated chores, prolonged head and neck bending, and extended periods of non-stop sitting are all part of the sewing process.
Musculoskeletal pain is a result of poor sewing room design, inappropriate table and chair heights, and repetitive motions performed for lengthy periods of time without a break. To be more precise, sewing may lead to wrist soreness, lower back discomfort, upper back pain, knee, shoulder, neck, and lower limb strain. The goal of sewing ergonomics is to maximize productivity while minimizing any negative consequences for your body. This is done by designing an ergonomic workstation that can prevent fatigue and injury. In addition to minimizing time spent readjusting your body to reach a more comfortable position and recovering from pain, good sewing ergonomics can also boost productivity. The sewing table, the cutting table, the sewing chair, the positioning of the iron and ironing board, and the sewing room’s lighting are the main components to take into account while designing an ergonomic sewing setting.
- Naaitafel
Shoulder and neck pain might result from sewing on a sewing machine that is positioned incorrectly on a sewing table. Too-low sewing tables can strain the back, while too-high sewing tables might induce shoulder and neck problems.
The height of the sewing table should provide a comfortable arm position while sewing. The rule is that an ergonomic sewing table should be a few inches below elbow height when used while standing and should be at or just above elbow height when used while seated.
It’s nearly impossible to find a pre-made table that is the right height. Therefore, purchase a sewing table with movable legs.
- Cutting Table
The cutting table should be at least waist-height or a little bit lower. It might be 35 to 40 inches high, which is taller than most cutting tables, depending on your height. With this height, you won’t have to stoop too low and risk damaging your back.
A fabric cutting table’s size can also affect its height. A larger table might need to be raised in order for the user to comfortably access all of its surfaces. On the other hand, a smaller table could be more cozy at a lower height.
- Sewing Chair
Solid back support and adjustability are features of an ergonomic sewing chair. Its backrest ought to provide lower back support. Your knees should be at a 90-degree angle, and your feet should be flat on the floor while you’re sitting.
Seek out a chair for sewing that:
- Enables height adjustment.
- Has a seat base depth adjustment and an adjustable back that offers lumbar support.
- Is designed with a waterfall edge at the front to reduce strain on the back of the knees, which interferes with blood circulation.
- Has armrests that may be removed or adjusted.
- Verlichting
Eye strain can be avoided in sewing rooms with proper illumination. You run the danger of experiencing headaches, drained face muscles, and poor vision if your sewing room is too dark. So keeping a bright, glare-free light in your workspace is essential.
- Ironing and putting the ironing board in a proper ergonomic position
The spine and shoulders should be in an erect stance while ironing. Set the height of the ironing board so that you can comfortably iron without stooping, bending over, or standing on one leg.
You can determine your ironing board’s proper height with a quick calculation. As you iron, measure your height so that your elbow can be bent at a 90-degree angle. Take 4 inches away from it. Your ironing board will fit perfectly at this height.
Alternatively, you can use a stool so that your elbows are at the correct angle. Keeping the power wire on the ironing board will also save you from having to repeatedly bend down to turn the iron on and off.
- Storage
To avoid having to raise them while they are at arm’s length, store heavy items within reach, such as your sewing machine or serger. Tools that are lightweight, like your scissors, ruler, or rotary cutter, can be kept further away.
Decor en personalisatie
1. Ideas for adding style and personality to your sewing room
Decorating a sewing room used to be quite difficult because of the space constraints, the prohibition against making holes in the walls, and the requirement to use the same furniture as everyone else.
These days, there are countless methods to give your sewing space flair and style. Therefore, if you are lacking motivation, keep reading to gain some unique sewing room decorating ideas.
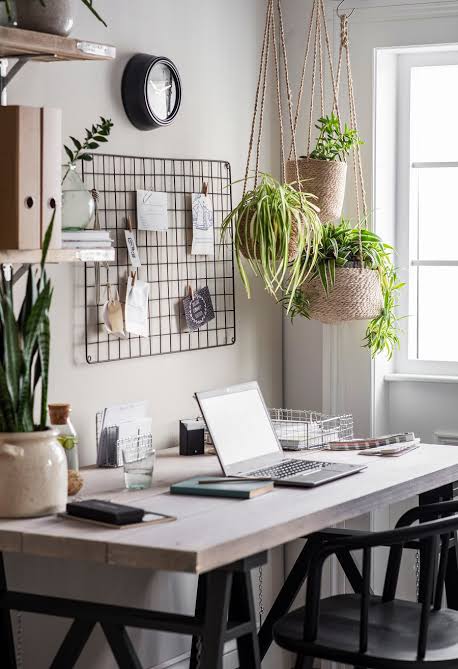
- Use plants and other accessories
Bring some fresh plants from outside into your drab sewing area. A space quickly becomes cozier and more homey when plants are added. Look for plants that require little maintenance if you are concerned. You may also opt for artificial plants.
Your sewing area may feel fashionable by adding additional fun items like cute mirrors, framed pictures and posters, etc. Your sewing space can be filled with so many subtle details that together make it something you can be proud of and feel comfortable in.
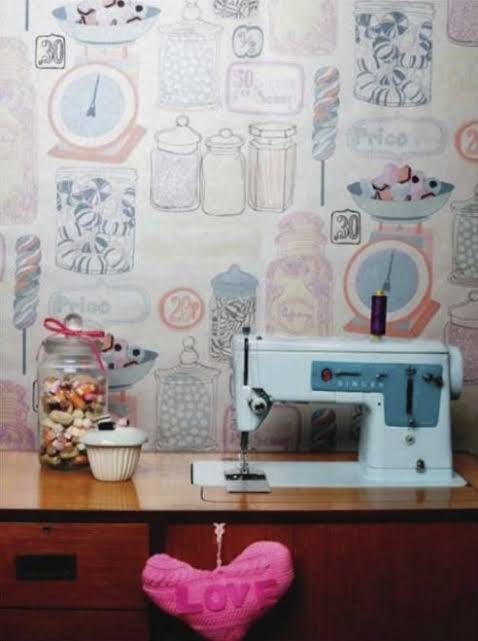
- Use wallpaper
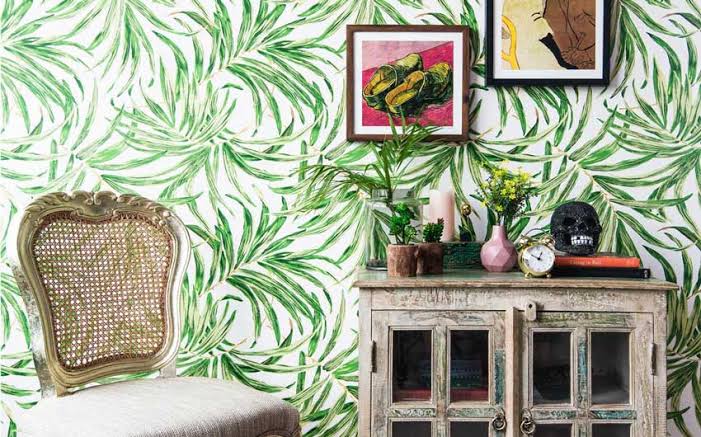
Your sewing room can be beautifully decorated by adding wallpaper. Not only do they come in a vast array of colors, textures, and patterns, but they are also incredibly simple to remove and modify for the ideal fit. They immediately give an otherwise plain room color and depth.
- Use painted clear jars

Clear jars are ideal for storing tiny sewing objects. Simply fill and secure the lids. It is simpler to see what is inside clear jars and you may express your creativity by painting them to complement your design.
- Affix wheels to everything
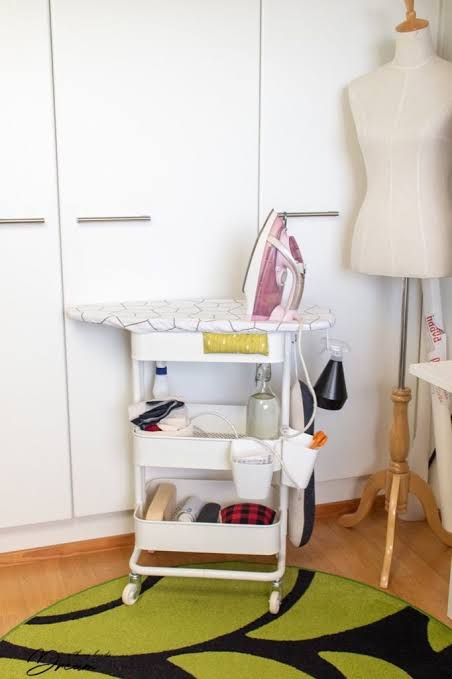
For simple access to crafts, put desks, shelves, and carts on wheels. This prevents heavy lifting and improves the aesthetics of your room. It also makes reorganization attempts easier.
- Use decorative lights

For a softer effect in your sewing room, layer some colorful lights or playful fairy lights. You can tape them over the wall, hang them from the drapes, or wrap them around the mirror. The aesthetic will be improved even more by placing a lovely task light on your sewing table.
- Use a rug

The correct area rug under your feet may bring charm to your sewing space just as effectively as the appropriate lighting can set the mood. The rug covers much of the unattractive floor to give your sewing area more personality while also providing your feet with a warm hug as you sew.
- Provide a hanging spot for rolled materials
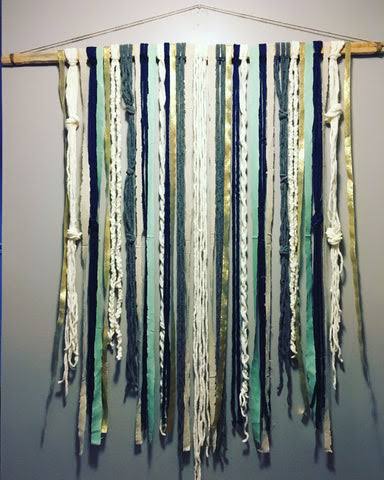
Rolls of material like washi tape and ribbons rapidly become scavengers. Give them somewhere to hang out. It may be as simple as attaching them with a few moveable hooks and dowels.
- Include a headboard
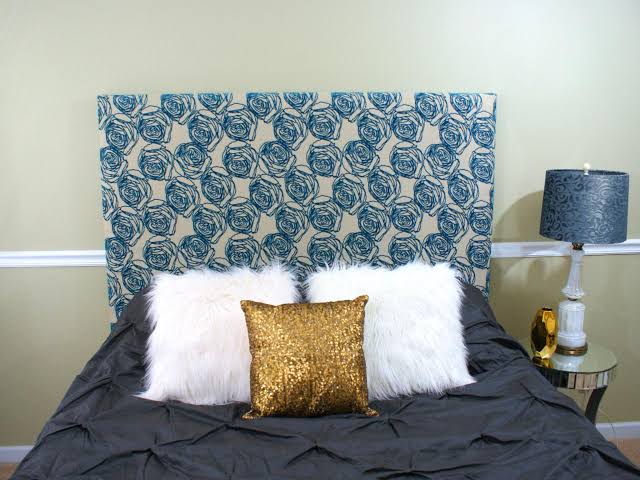
A sewing room may look quite boring with the same furniture lying around. If your sewing room has a bed leaning against the wall or is a small area of your bedroom that you have converted to a sewing space, a stunning headboard may instantly bring glamor and a touch of home to the space.
Another use for the headboard is that when you are sitting up and relaxing in bed, in other words taking a break from sewing, you have a nice surface to lean on. It serves as the room’s center of attention as well. You can select a headboard with a bold or muted appearance depending on your personality.
- Create smart closets
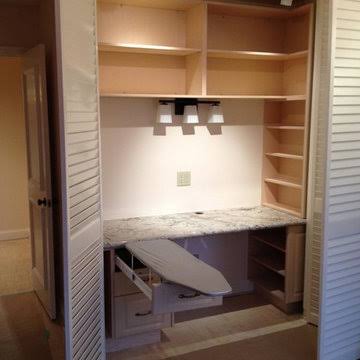
A closet might be used for storage, but with a little imagination, you could also turn it into a secret workspace. This works wonders, especially if you do not have a place for an additional table. When not in use, just shut the wardrobe doors.
2. DIY decor projects for a budget-friendly makeover
It frequently takes time and effort to design a lovely sewing space, but it should not cost a lot of money. You may personalize your sewing room on a tighter budget by using these frugal DIY decor projects.
- Create customized wallpaper
This inexpensive decorating option can work for you if you do not want to spend money on wallpaper. DIY wallpaper is simpler to make than it seems. Plus, it adds great style to your sewing room. All you need is some paint and the appropriate stencil pattern.
Purchase some inexpensive stencil plastic. Then, using scissors, cut out the pattern you wanted for your stencil after tracing it onto the plastic. You can then begin painting with the color of your choice.
- Paint the walls
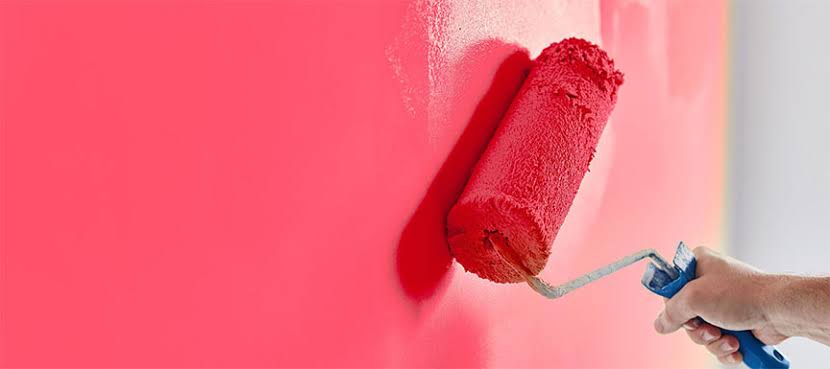
Applying a fresh coat of paint will have the most influence on your sewing room without costing much money. Every list of inexpensive decorating ideas includes it.
Your room will appear to have wainscoting if you paint the bottom third of your wall a different color.
Panelling has the same effect as painting the wall a different color halfway up.
You may simulate a chair rail by painting a stripe down the center of the wall.
- Create attractive pinboard

Put all of your little sewing supplies on a pinboard to give your sewing area a unique touch. Making your own pinboard is incredibly simple and cheap. To begin, get a wooden frame and paint it. Then, hot-glue little clips to the wooden frame. After that, put the frame in an accessible location so you may change the layout whenever you please.
- Create inexpensive curtains
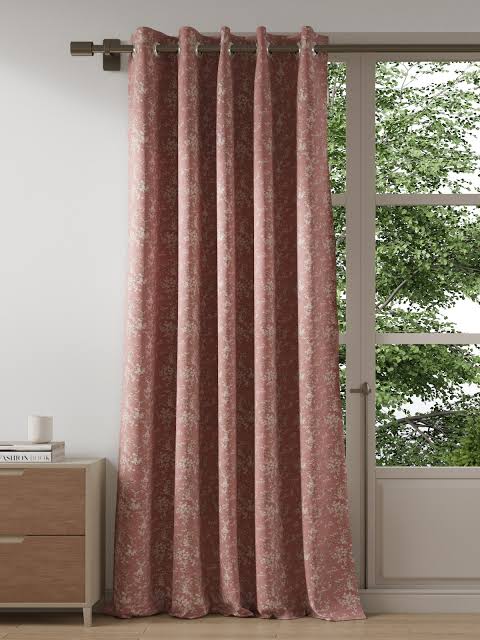
In your sewing room, hanging drapes directly at the ceiling and adding enough panels to cover the entire wall instantly makes a statement.
Budget-friendly DIY curtain solutions are useful because it might be pricey to purchase curtains for an entire wall.
Either build curtains out of bed linens or paint stripes on some drop clothing. Once placed on the wall, they will resemble a lot like store bought curtains.
- Decorate cabinet doors with wallpaper

Redesigning the cabinet doors in your sewing room with graphic wallpaper is the ideal DIY project if you’re searching for a fun, inexpensive method to paint with wallpaper. Simply pick out some colorful wallpaper and affix it on the cabinet doors.
- Create hanging plant pots
A fantastic DIY decoration tip that won’t break the bank is to decorate your sewing room with lovely hanging pots. You’ll save money by using these plant hangers instead of purchasing pricey planters from a store. To make hanging flower vases, you can use metal bowls or discarded plastic bottles. The planters should then be suspended using brass, copper, or nylon tubing. Simply make a DIY frame, gather twigs or branches that have fallen on the ground, and decorate the frame with the twigs.
3. Tips for incorporating personal touches while maintaining a functional workspace
For maximum efficiency in a sewing room, functional space architecture is essential. You can save space and time by decorating and organizing your sewing room in a simple manner. Here are some crucial actions to take to maintain a functional workspace in your sewing room:
- Take a moment to consider your needs and how you want to use your sewing space. This will enable you to choose the appropriate furniture, storage options, and decor. In addition, your physical and mental spaces at your sewing room are equally crucial and interdependent.
- Decluttering should come first. Start by clearing the area and getting rid of anything you do not need. This will make it simpler to organize the objects and assist make extra room for your sewing supplies.
- Choose pieces of furniture that may be used for a variety of tasks when furnishing a sewing area. Additionally, you avoid wasting money, time, space, and energy on cleaning.
- Choose floating shelves that can be installed on walls as opposed to large shelves or cabinets. They give your sewing room a minimalistic feel and make it more functional.
- Consider folding furniture that can be collapsed when not in use for small sewing rooms.
- Use furniture with concealed storage, such as a sewing chair with drawers underneath.
- Include plants. Scientific research has shown that plants can reduce tension and anxiety. Any place gets life and color from plants. Put them in plain, unadorned pots and incorporate them into your sewing area. You may even choose to hang them.
- An efficient sewing room must make the most of natural light. Both aesthetically and functionally, natural illumination can be quite important. The textures, hues, and patterns of numerous decorative items are enhanced by natural illumination. Artwork, rugs, and furniture fall within this category. Additionally, natural light gives your sewing room a roomier, more open, and more pleasant feel. Importantly, natural illumination can lessen the demand for artificial lighting, which can help to lower energy use. This lowers electricity costs and lessens carbon emissions.
Samenvatting
This post, we believe, has given you a thorough understanding of designing your sewing room. We have incorporated everything right from the scratch that will help you to make the most out of your sewing room. We have covered every minute element, including picking a place for your sewing room, the advantages and disadvantages of various sewing locations, layout and storage ideas for your sewing room, color and lighting recommendations for maximizing your sewing room’s effectiveness, furniture and equipment recommendations including ergonomic furniture for your sewing room, and different sewing room decorating ideas. A neat sewing area is essential for maximizing efficiency, as we’ve shown in this post. It guarantees effective operations with superior outcomes. All things considered, a neat sewing area will boost output and lower the risk of errors.
A sewing room is a creative place, so you can use unconventional materials to adorn it and get creative with your storage options. Please share your thoughts on the layout and design of your sewing area in the comments section below. Also, share with us about how you’ve designed and personalized your sewing room. Happy Sewing!
Bent u een gevorderde naaister, kijk dan eens bij onze beste naaimachines, beste naaiboeken En beste naaitijdschriften berichten en als u op zoek bent naar een mechanisch, zwaar uitgevoerd, quilten of industriële naaimachine, bekijk enkele van onze geweldige artikelen. Als u een beginnende naaister bent, bekijk dan onze beste naaiboeken voor beginners, beste naaimachines voor beginners En beste naaimachines onder $200 starten.
Voor merkgerelateerde artikelen, check Beste Bernette | Beste Bernina | Beste Brother | Beste Husqvarna Viking | Beste Janome | Beste Juki | Beste Singer |
Voor de beste accessoires, check Beste stoelen | Beste tafels | Beste calqueerpapier | Beste machineoliën | Beste scharen en scharen | Beste naaivoeten | Beste naalden | Beste naaisetjes |
Veel plezier met naaien.


