Openbaarmaking van partners: SewingInsight.com is deelnemer aan het Ebay Partner Network en Amazon Services LLC Associates Program. We verdienen een kleine advertentievergoeding door te linken naar producten op Ebay en Amazon. Dit verhoogt de prijs voor u als lezer niet, maar u steunt onze kleine onderneming.

Een Teddybeer Met Zakken – Gratis Naaipatroon
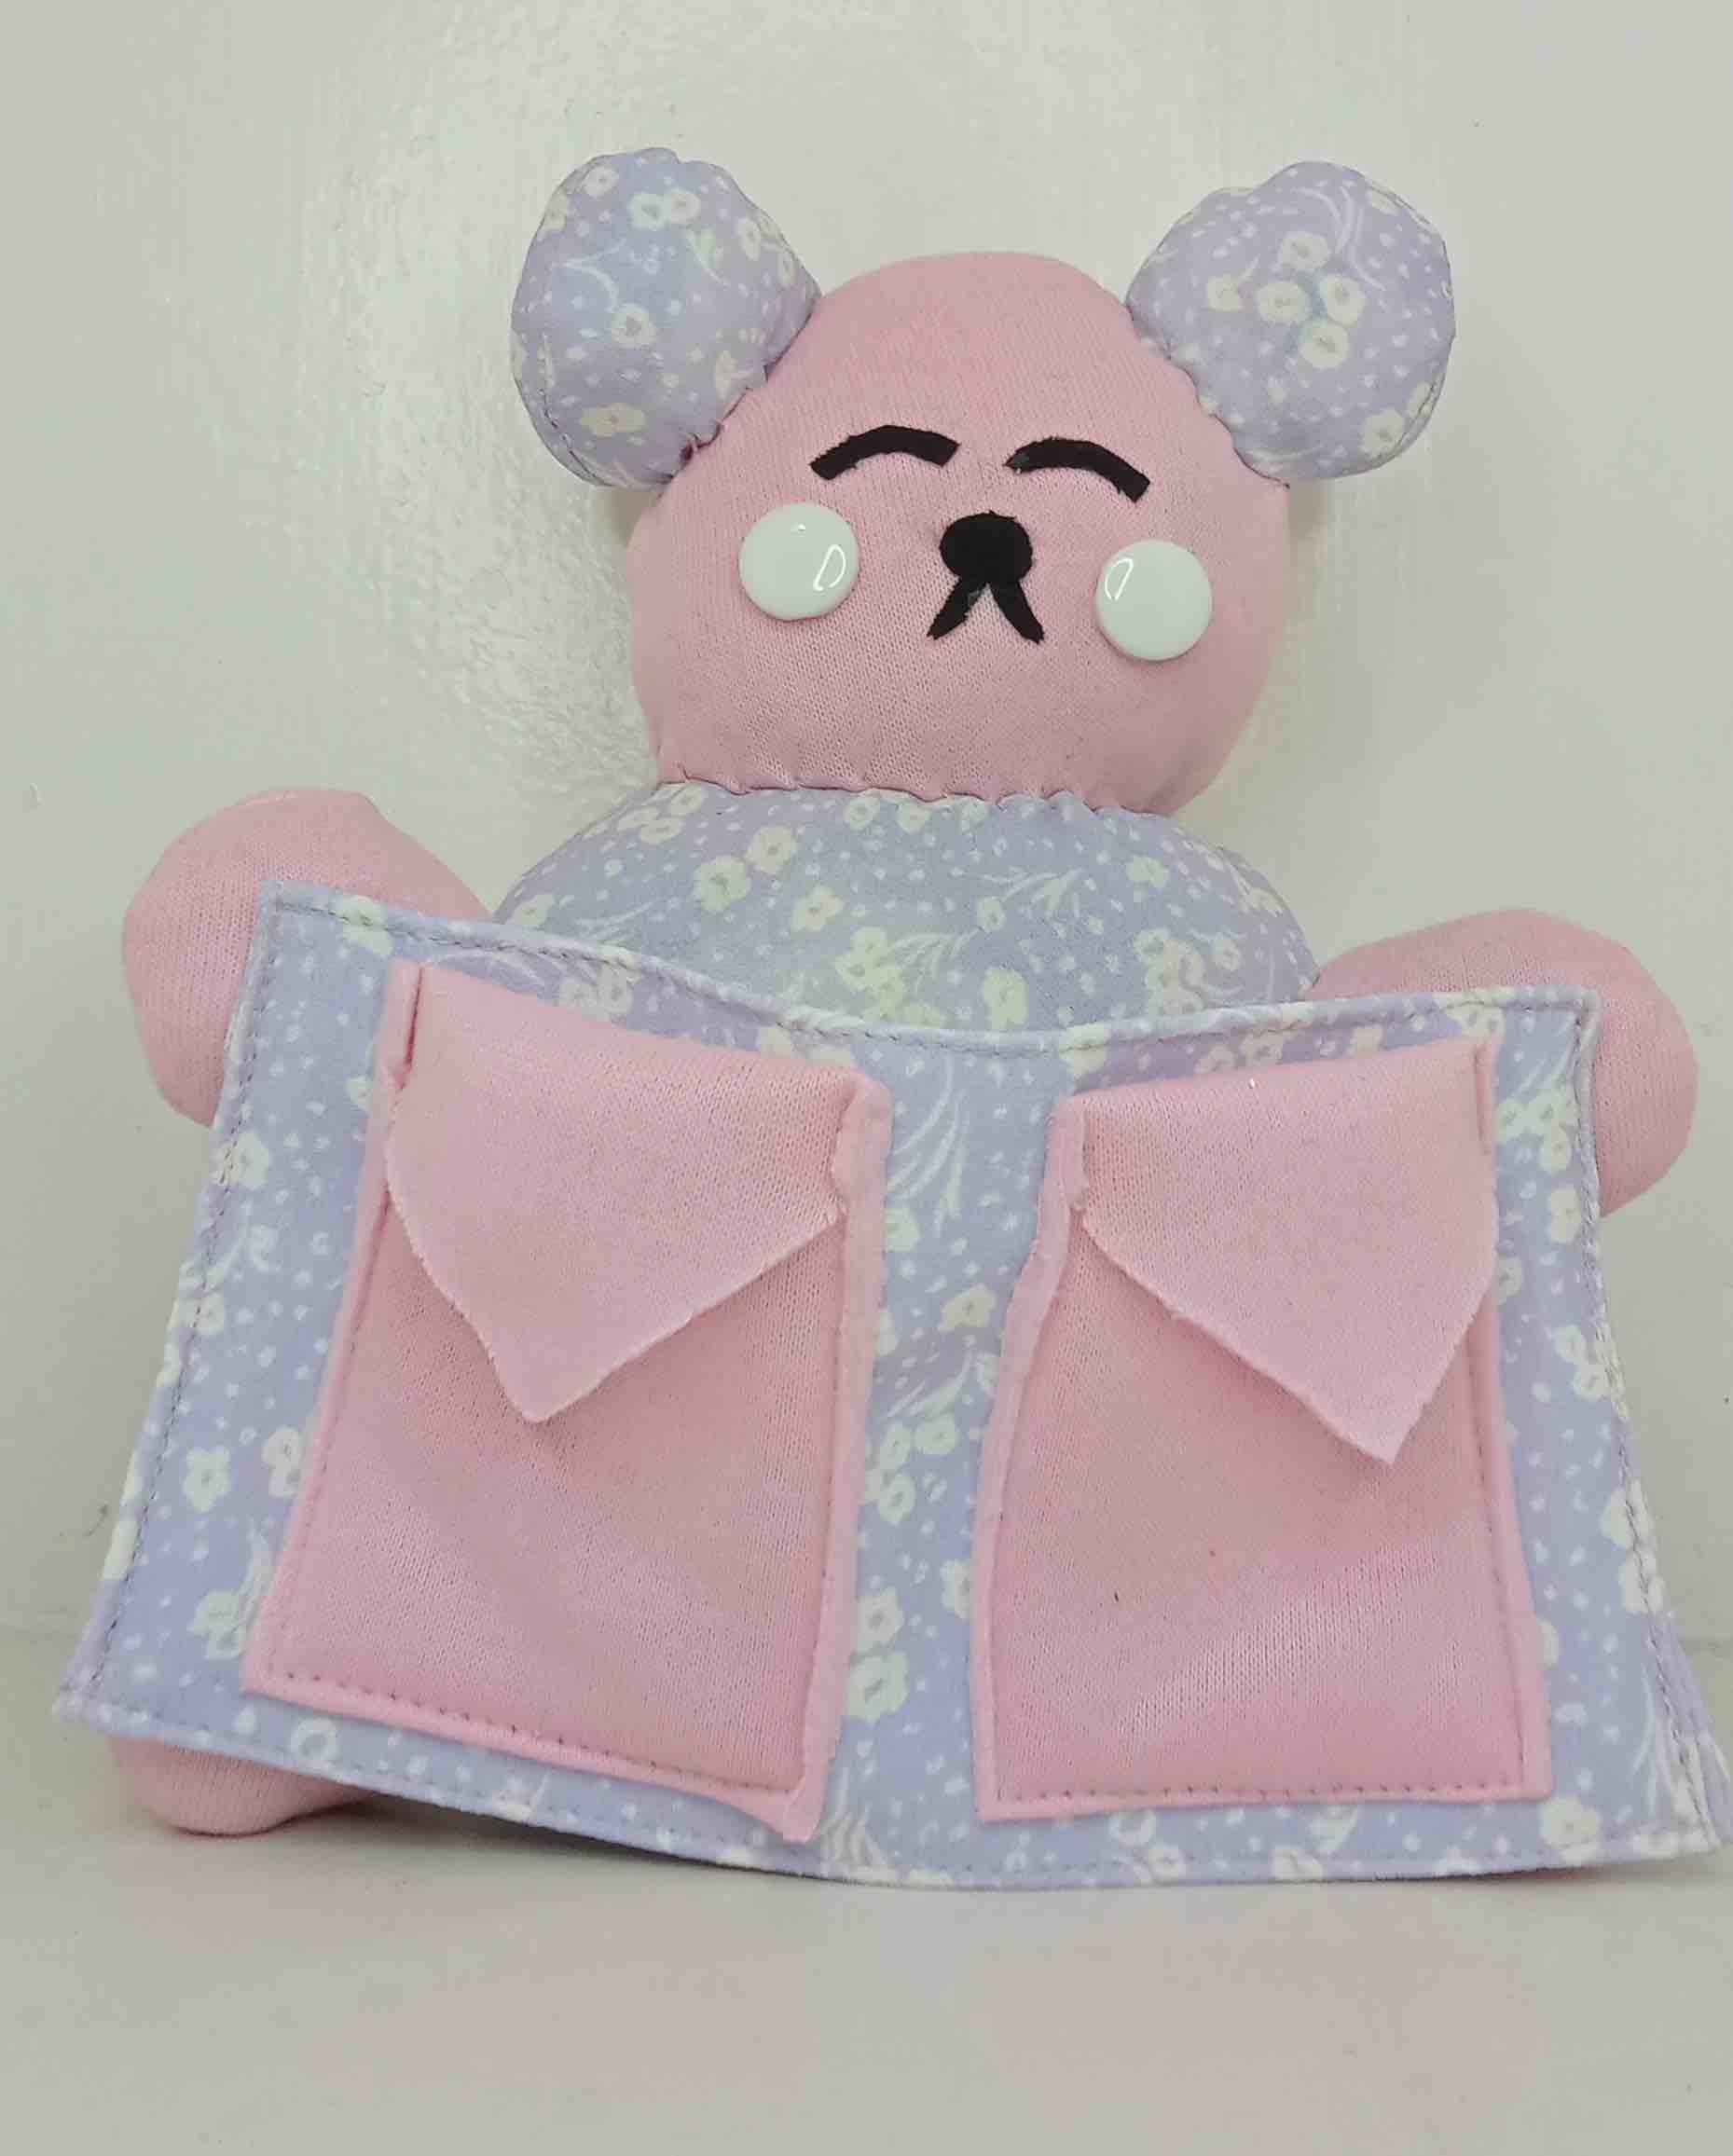
If you love sewing stuffed animals, then you’ll love this teddy bear pattern! It’s not your typical teddy bear because I wanted it to look different and have a unique touch to it. I also wanted this teddy bear to be for practical use as well, so I’ve added two large pockets in the front!
This teddy bear is great to sew for the little ones as a meaningful present. It’s also great to sew for yourself, if you love stuffed animals, and it can be used to store some of your stuff like jewelry or small items.
If you’re interested in sewing other patterns for kids or adults, then be sure to check out the adorable twisted headband sewing pattern!
Sewing a Teddy Bear With Pockets
This is a beginner-friendly sewing pattern that’s perfect for mom’s with little kids and to those looking where to use their scrap fabrics.
Basic hand sewing techniques are required and a little use of sewing machine. I would recommend the Singer Making the Cut sewing machine because it’s the best machine we recommend for beginners because it’s not expensive, has over 97 different stitch applications and has a built-in needle threader.
This is a great project to do when you have extra scrap materials laying around. It will look more authentic, artistic and it’s practical because of the pockets!
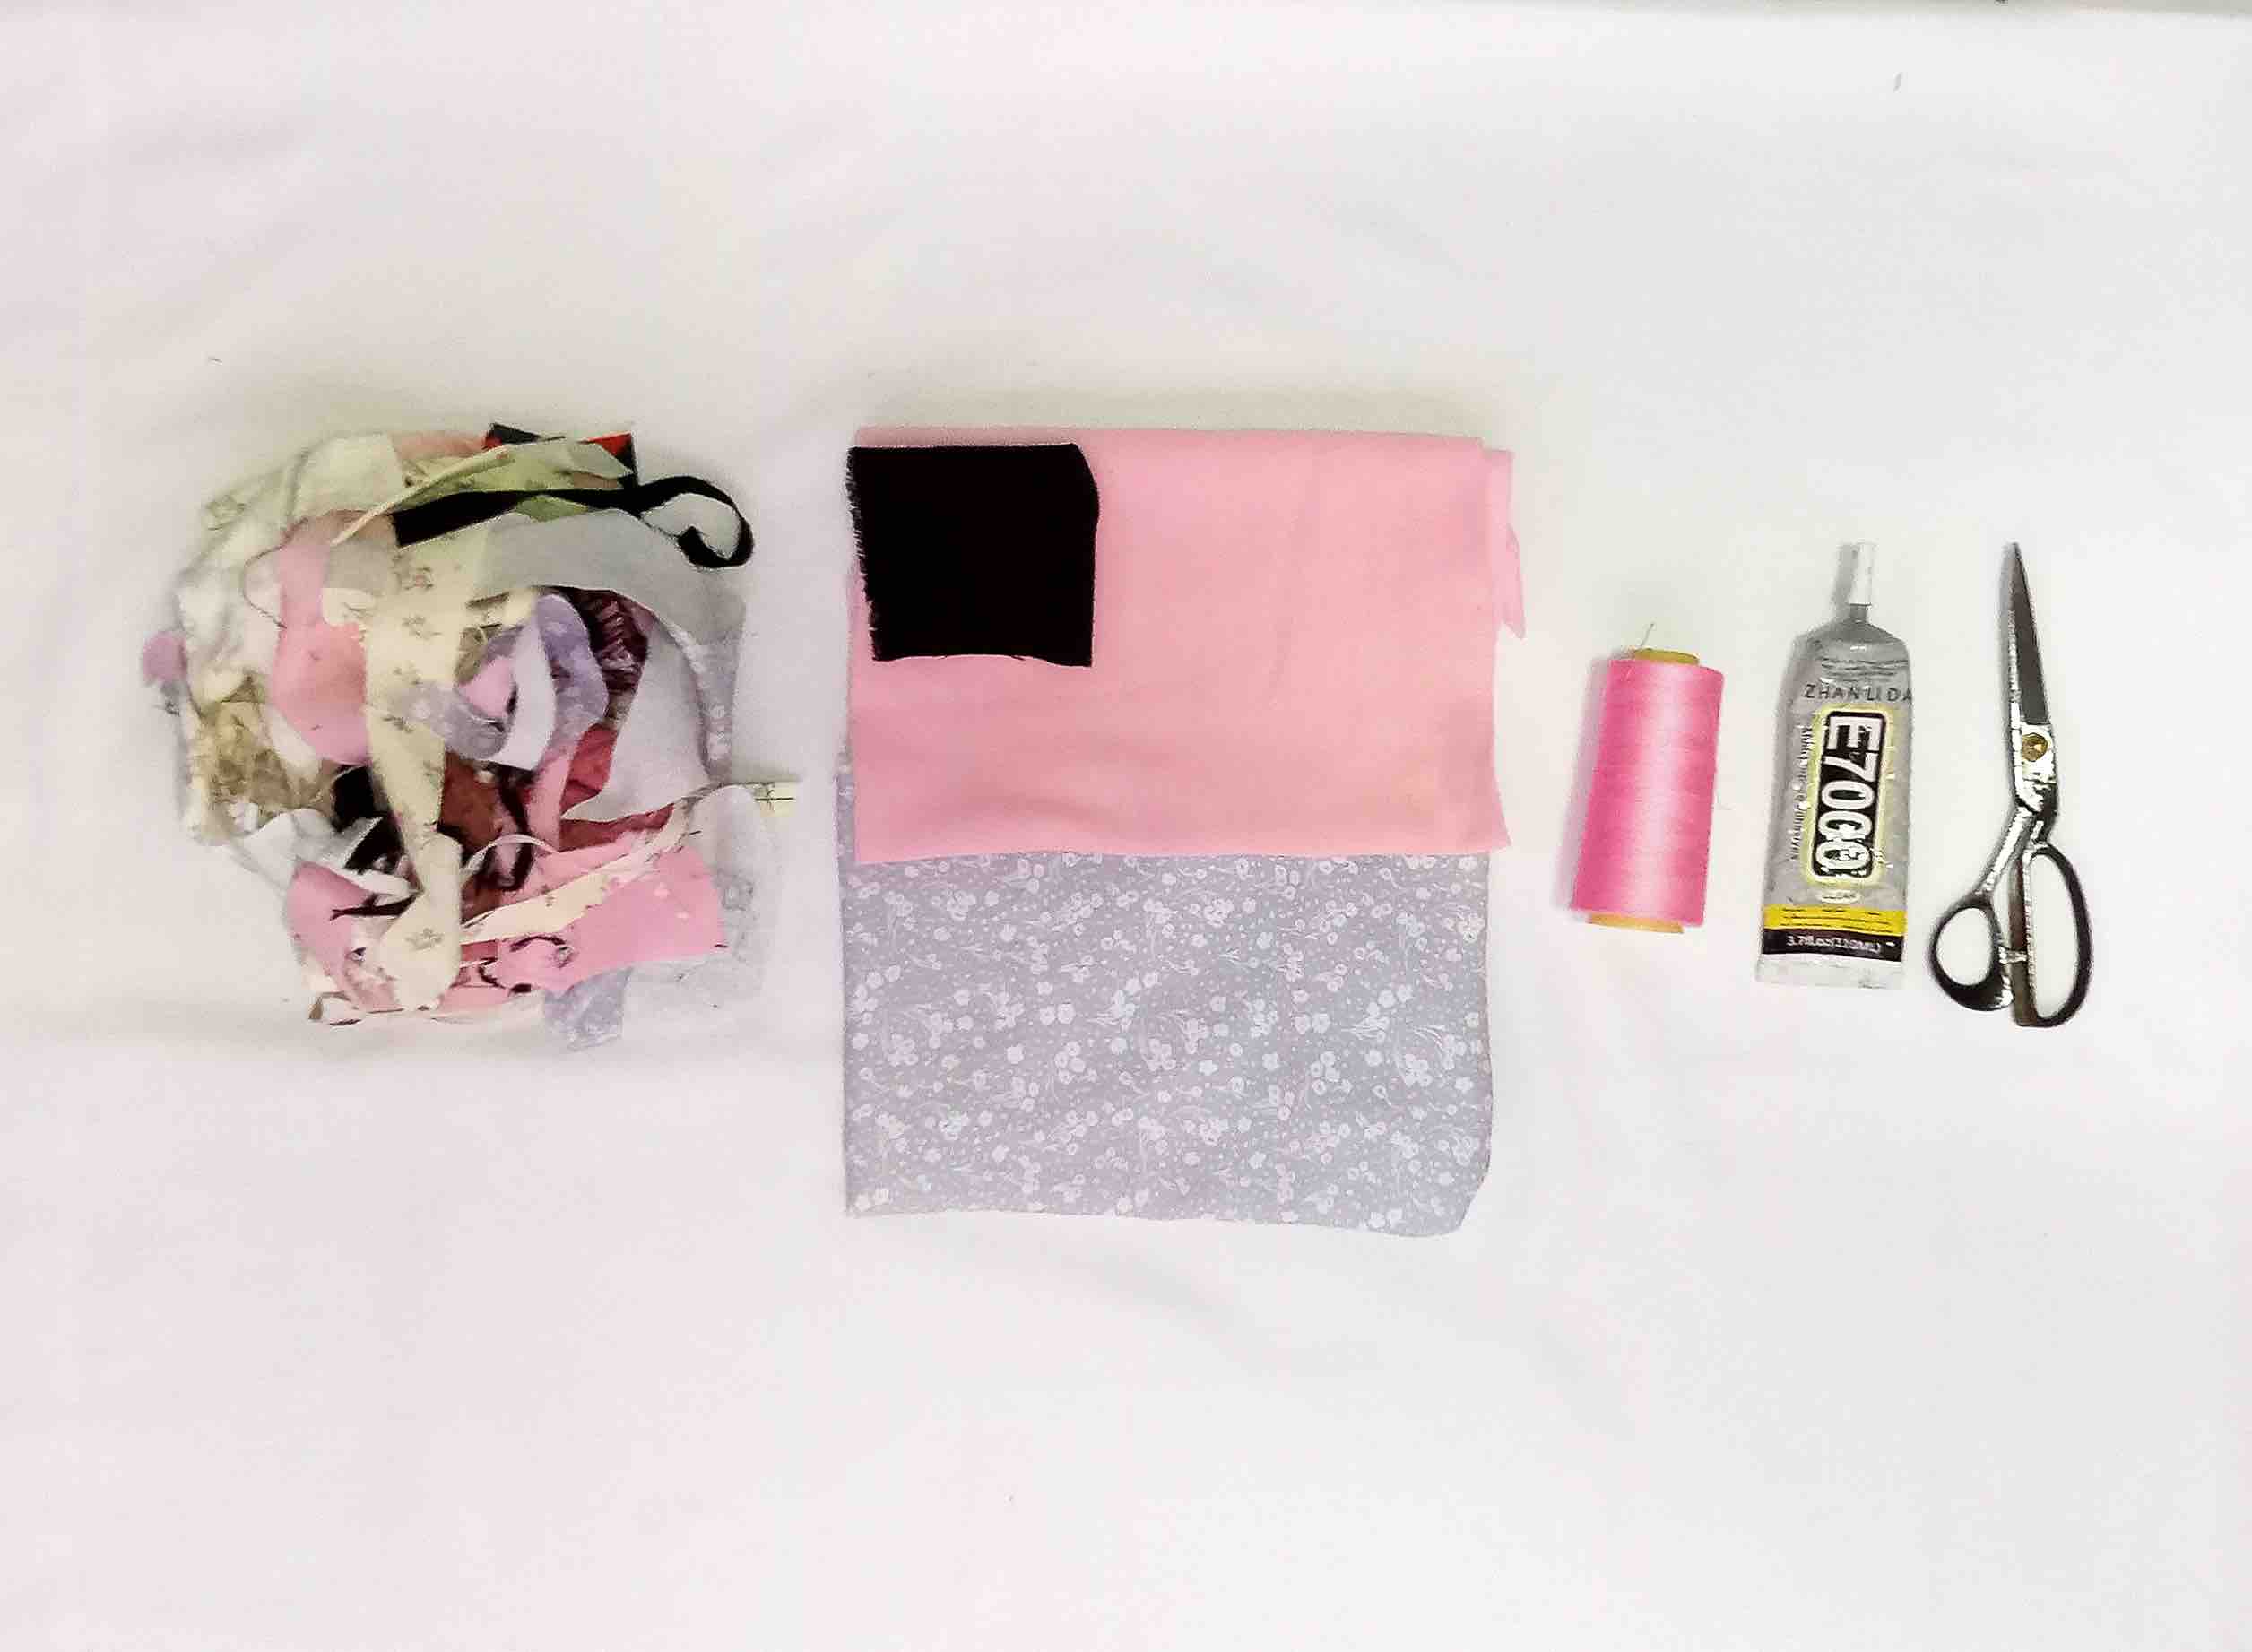
Benodigde materialen
- Scrap Fabrics
- Schaar
- Draad
- Fabric Glue
- Needle for hand sewing
Teddy Bear Sewing Instructions
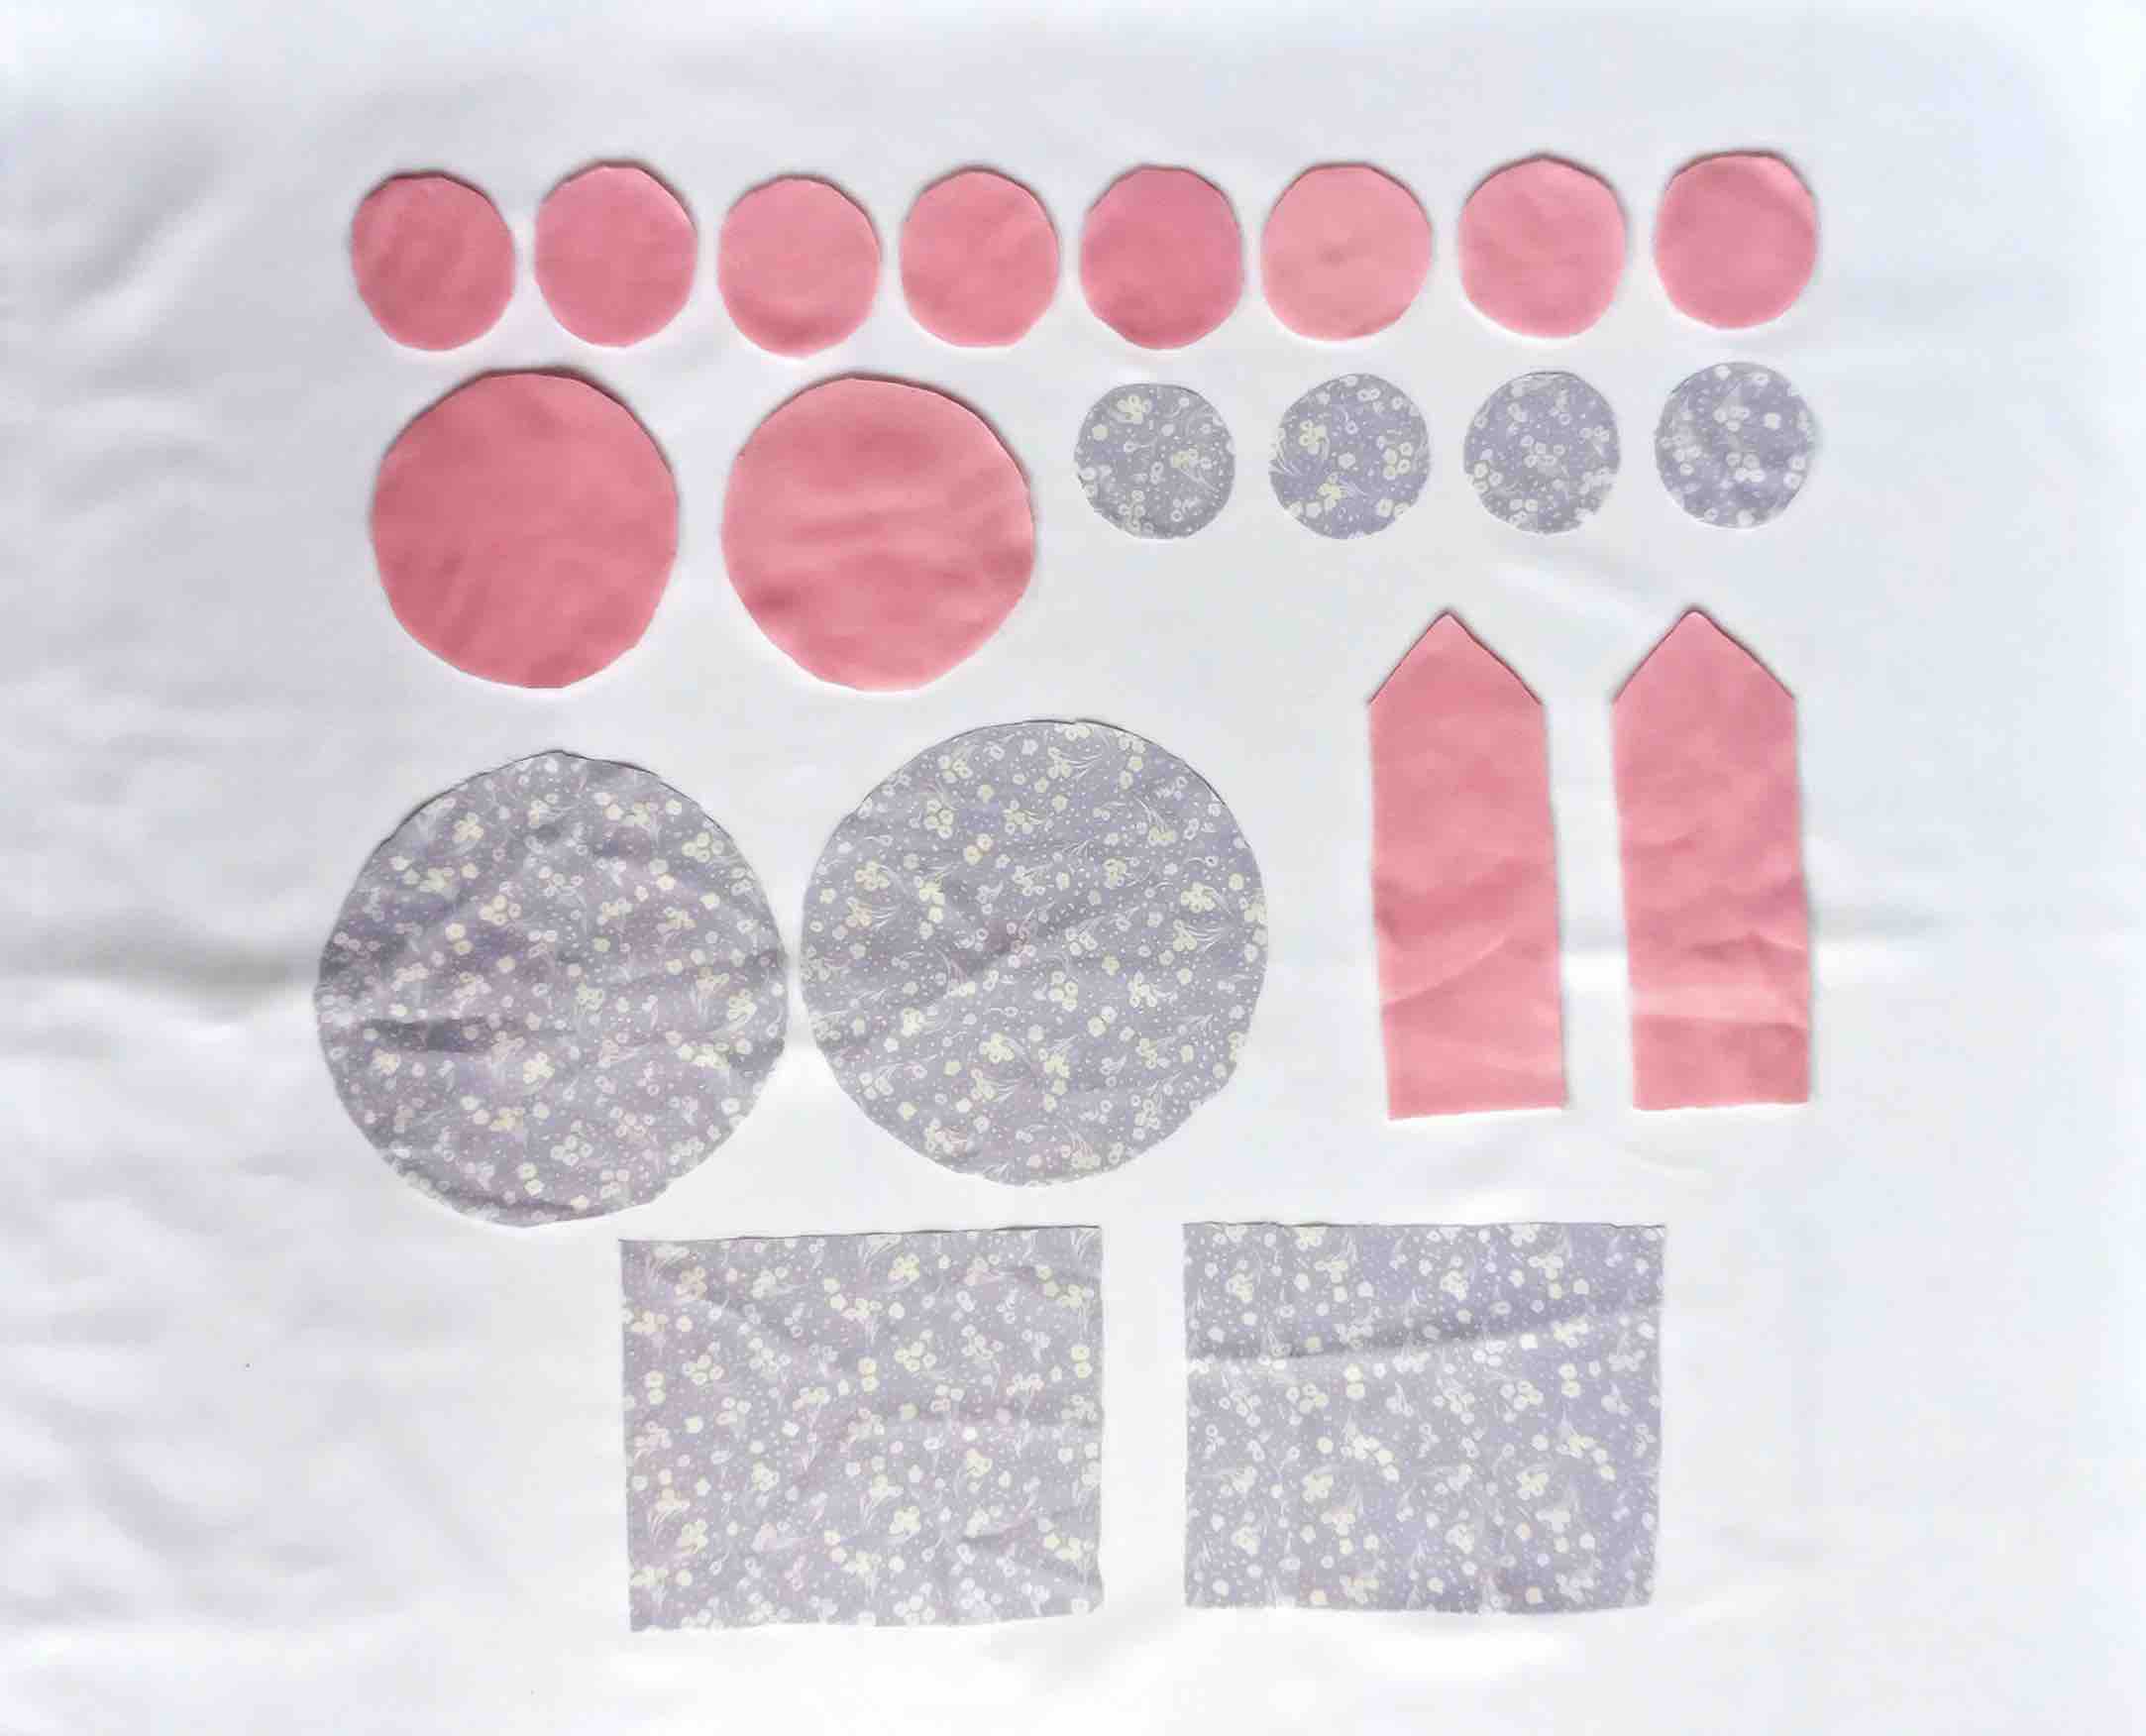
1. Start by cutting all the fabric pieces. The round and rectangular pieces. Plus, the arrow shape pieces for the pocket details. The size of the pieces will depend on how big you want your teddy bear to be.
Tip: You can use round objects like plates, cups, or anything circular to help cut your fabric into the right round shape.
2. Sew around the edges of each round pieces. Take note to leave a small gap so you can turn it right side out later and also for stuffing. Do not sew all the way around.


3. Turn the fabric pieces right sides out, then, take your scrap fabrics and stuff the round pieces to give them shape.


4. Assemble the Body. Once the pieces are stuffed, hand sew all the parts together to form the teddy bear’s body.

5. Let’s create the front pocket details. Adjust the size of the rectangular pieces depending on how wide the stuffed teddy bear turns out. Start by sewing the rectangular pieces right sides facing each other. Turn them inside out and topstitch along the edges.


6. Fold the arrow shape pieces to form an envelope shape pocket. Position the two pockets above the rectangular pieces, pin it in place and sew the edges.


7. Hand sew the pocket details to the hand of the teddy bear.

8. Make the face. Cut out the eyes and nose from the black fabric and attach them to the teddy bear’s face using a fabric glue.


For the final touch, I decided to glue on white buttons on the cheeks to make the teddy bear even cuter!

Laatste gedachten
Thanks for spending your precious sewing time with me! Be sure to join our newsletter as we are releasing new sewing patterns and round-ups every month!
If you’re new to sewing, be sure to check out the Best 11 Sewing Machines For Beginners in 2025 that we recently updated!
Bent u een gevorderde naaister, kijk dan eens bij onze beste naaimachines, beste naaiboeken En beste naaitijdschriften berichten en als u op zoek bent naar een mechanisch, zwaar uitgevoerd, quilten of industriële naaimachine, bekijk enkele van onze geweldige artikelen. Als u een beginnende naaister bent, bekijk dan onze beste naaiboeken voor beginners, beste naaimachines voor beginners En beste naaimachines onder $200 starten.
Voor merkgerelateerde artikelen, check Beste Bernette | Beste Bernina | Beste Brother | Beste Husqvarna Viking | Beste Janome | Beste Juki | Beste Singer |
Voor de beste accessoires, check Beste stoelen | Beste tafels | Beste calqueerpapier | Beste machineoliën | Beste scharen en scharen | Beste naaivoeten | Beste naalden | Beste naaisetjes |
Veel plezier met naaien.


